
You may be looking to enhance your gaming experience, speed up rendering or video editing tasks, or make your computer more capable for specific applications.”How do I overclock my PC” is a common and excellent question. Overclocking can often provide improved performance without the need to invest in entirely new hardware.
Contents
- 1 What is overclocking in PC?
- 2 Should we overclock the CPU, GPU, or both?
- 3 How to Overclock CPU ?
- 4 How to test CPU stability after overclocking
- 5 CPU Overclocking Risks:
- 6 GPU overclocking
- 7 Is GPU Voltage Increase Necessary for Overclocking?
- 8 GPU Overclocking Risks:
- 9 How to measure the effects of overclocking:
- 10 Conclusion on "How do I overclock my PC"
What is overclocking in PC?
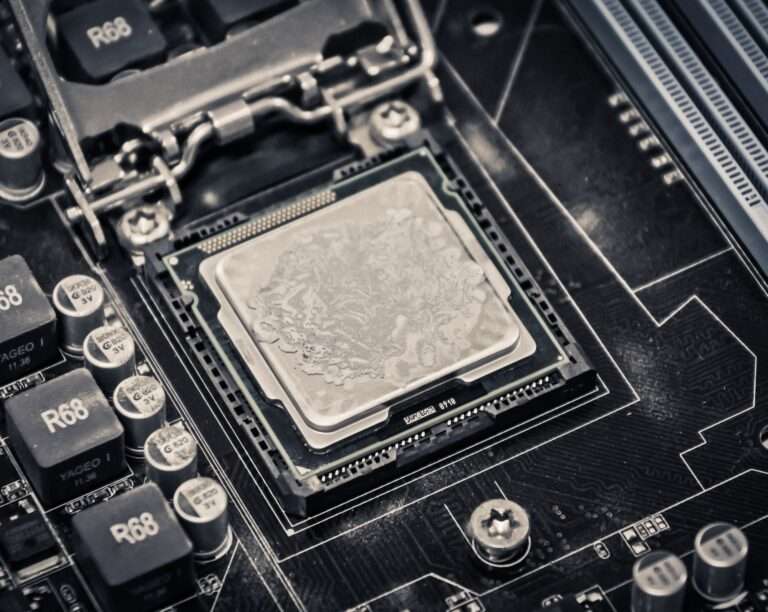
Overclocking in a PC is the process of increasing the clock speed of one or more components in a computer system beyond the factory default settings. The clock speed determines how many cycles per second a component can complete, so overclocking can lead to increased performance.
For example, let’s say you are playing a first-person shooter game and you need to turn around quickly to shoot an enemy behind you. If you have a low clock speed, your character will turn around slowly, which could give the enemy time to shoot you first. However, if you overclock your CPU, your character will turn around more quickly, giving you a better chance of survival.
However, it is important to note that overclocking can also increase heat generation and power consumption, and can potentially damage your hardware if not done correctly.
Benefits of overclocking PC:
- Increased performance in gaming, rendering, and other demanding applications: Overclocking can boost the performance of your CPU, GPU, and other components, which can lead to significant improvements in frame rates and rendering times.
- Reduced latency: Overclocking can also reduce latency, which is the time it takes for a component to respond to a request. This can be beneficial for gaming and other applications where responsiveness is important.
- Improved stability: In some cases, overclocking can improve the stability of your system. This is because overclocking can help to identify and resolve potential hardware problems.
Importance of careful steps
It is important to take careful steps when overclocking your hardware to prevent damage. Here are some tips:
- Start slowly: Don’t try to overclock your components to their limits right away. Start by increasing the clock speed by a small amount and then test the system for stability.
- Use a stress testing tool: A stress testing tool can put your components under a heavy load to test their stability. This will help you to identify any potential problems before they cause damage.
- Monitor your temperatures: Overclocking can generate more heat, so it is important to monitor the temperatures of your components to make sure that they do not get too hot.
- Use a good cooling system: A good cooling system will help to keep your components cool and prevent them from being damaged.
We’ll delve into these aspects in depth to gain a more comprehensive understanding of our core question: “How do I overclock my PC?”
Should we overclock the CPU, GPU, or both?
Consider your PC’s main use and your performance goals when deciding whether to prioritize CPU or GPU overclocking:
1. Gaming Priority:
If you’re a gamer, the GPU (Graphics Processing Unit) should often be your first priority. Overclocking the GPU can significantly boost gaming performance by delivering higher frame rates and better graphics quality.
2. General Performance Priority:
For general computing tasks and applications that rely more on the CPU (e.g., video editing, 3D rendering, software development), focusing on CPU overclocking can lead to performance improvements in these areas.
3. Balanced Approach:
In many cases, a balanced approach is recommended. Overclock both the CPU and GPU to achieve overall system performance improvements. This is especially important for gamers who want a well-rounded gaming experience that doesn’t bottleneck on either the CPU or GPU.
Ultimately, your choice should align with your specific computing needs and the components you want to optimize for your intended use.
We’ll now explore a detailed guide on overclocking of both CPU & GPU. Throughout this process, we’ll prioritize safety and precautionary measures to ensure a smooth and secure overclocking experience.
How to Overclock CPU ?
Before we dive into the details, it’s crucial to answer the primary question: Which CPUs can be overclocked?
Whether a CPU can be overclocked or not depends on its design and the manufacturer’s intentions. Here’s an easy and simple way to understand it:
CPUs that can be overclocked:
Unlocked CPUs: Many processors with a “K” (e.g., Intel Core i7-9700K) or “X” (e.g., AMD Ryzen 9 5900X) in their name are unlocked and can be overclocked. These CPUs are designed for enthusiasts who want to push their performance limits.
CPUs that cannot be overclocked:
Locked CPUs: Processors without a “K” or “X” in their name are typically locked and not designed for overclocking. For instance, Intel Core i5-9400 or AMD Ryzen 5 3600.
There isn’t a specific rule for checking overclockability, but looking at the CPU’s model name is a good start. If it has a “K” or “X,” it’s usually overclockable. However, it’s essential to check the specific CPU’s documentation and reviews to be sure.
Steps to overclock the CPU:

Step 1: Confirm Your CPU and Motherboard Compatibility
Let’s use the Intel Core i7-9700K and the MSI MEG Z790 Ace motherboard as an example to understand this compatibility aspect.
Not all CPUs and motherboards are a good match for overclocking. So, before you begin, ensure that your CPU and motherboard are compatible. Here’s how you can check:
Intel Core i7-9700K: This CPU is known for overclocking. It has a “K” in its name, which indicates that it’s an unlocked CPU, allowing you to overclock it. So, in this case, you have a compatible CPU for overclocking.
MSI MEG Z790 Ace (motherboard): Motherboards, like the MSI MEG Z790 Ace, are designed with certain chipsets that support overclocking. In this case, the Z790 chipset is often used for overclocking, which means it’s compatible with the Intel Core i7-9700K and overclocking.
While many pre-built PCs come with compatible CPU and motherboard combinations, it’s still wise to confirm this compatibility, especially when you consider upgrading or overclocking your systems. It’s a preventive step that avoids potential issues.
Step 2: Ensure Your BIOS or UEFI Is Current
Now, let’s focus on the MSI MEG Z790 Ace motherboard to clarify this step about keeping your BIOS or UEFI up to date.
Your motherboard’s BIOS or UEFI is like the command center of your computer. It plays a crucial role in the startup process and houses the essential settings for overclocking.
Here’s what you need to do:
MSI MEG Z790 Ace (motherboard): To make sure your BIOS or UEFI supports the latest features and optimizations for overclocking, you should update it. MSI, the manufacturer of the MSI MEG Z790 Ace, regularly releases BIOS updates. Go to MSI’s official website and locate the support or downloads section for your specific motherboard model. There, you’ll find the latest BIOS or UEFI updates for your motherboard.
By keeping your BIOS or UEFI current, you ensure that it’s ready to handle the overclocking settings and features effectively. This step is essential to make your overclocking experience smooth and trouble-free.
Step 3: Accessing the BIOS or UEFI
Entering the BIOS or UEFI is the next crucial step. The process can slightly vary depending on your motherboard, so let’s illustrate this with the MSI MEG Z790 ACE Gaming Motherboard:
Here’s how you do it:
1 Turn on your computer: Start your computer as usual.
2 Press the Delete key repeatedly: While your computer is booting up, you’ll need to press the Delete key repeatedly. Keep tapping it until you see the BIOS or UEFI screen. The MSI MEG Z790 ACE Gaming Motherboard typically uses the “Delete” or “DEL” key to access the BIOS. However, other motherboard brands like ASUS, Gigabyte, ASRock, and MSI might also use “Delete” or “F2.” Specific motherboard models can have different keys, so it’s wise to check your motherboard’s manual or the manufacturer’s website for the exact key required.
Step 4: Boost the CPU Clock Multiplier
The CPU clock multiplier is like the accelerator pedal for your CPU’s speed. To overclock your CPU, you’ll want to increase this multiplier. On the Intel Core i7-9700K CPU, here’s how you can do it:
Access BIOS or UEFI: First, enter the BIOS or UEFI using the steps we discussed earlier, using the Delete key for the MSI MEG Z790 Ace motherboard.
Navigate to CPU Settings: Inside the BIOS or UEFI, use your arrow keys to find the “CPU Settings” section. This is where you’ll locate the CPU clock multiplier setting.
Increasing the Multiplier: When you find the CPU clock multiplier setting, you can raise the value. Each CPU has a different maximum safe limit for overclocking, and the Intel Core i7-9700K typically allows for multipliers of up to 50-52, depending on your specific CPU.
- Important Care: It’s crucial to be cautious with this step. Start with small increments, like increasing the multiplier by 1 or 2 at a time. After each change, save your settings and exit the BIOS/UEFI. Then, test your system’s stability using software like AIDA64. If your system becomes unstable or overheats, dial back the multiplier or adjust the CPU voltage (vCore) to maintain stability.
Remember, when overclocking your CPU, take it slow and steady to ensure you don’t push it beyond its limits, which can lead to overheating or instability. Please note we will discuss how to use AIDA64 software in detail.
Step 5: Increase the CPU Voltage
Now, let’s talk about raising the CPU voltage, which can help stabilize the CPU at higher clock speeds. However, remember this step comes with some cautions:
Increasing the CPU Voltage: In the BIOS or UEFI, find the CPU voltage setting. The Intel Core i7-9700K can handle a voltage increase, but keep it within safe limits. A moderate increase can go a long way.
Heat and Lifespan: Be aware that more voltage means more heat generation. Excessive voltage can shorten the CPU’s lifespan, so don’t push it too far.
Step 6: Test for System Stability
Once you’ve made these changes, it’s time to ensure your system is stable.
Stress Test: Run a stress test program. This software will push your CPU to its limits and help you gauge stability. As we discussed earlier, tools like AIDA64 and Prime95 are excellent for this task. In the following section, you’ll discover how to stress test your overclocked CPU using AIDA64.
Step 7: Iteration for Higher Performance
If you’re seeking the best performance, you can iterate:
Repeat Steps 4-6: Go back to increasing the CPU clock multiplier and voltage, but take it slowly. Keep testing for stability after each adjustment. It’s like fine-tuning a musical instrument.
Caution: Remember, overclocking carries risks. Always monitor temperatures and don’t push your CPU beyond its limits. The Intel Core i7-9700K can handle overclocking, but be cautious to avoid overheating or instability.
Step 8 Save and exit:
To exit the BIOS on an MSI MEG Z790 Ace motherboard, you can use the F10 key. This is the default key for exiting BIOS on most motherboards. However, you can also check the BIOS manual for your motherboard to confirm the exit key.
Here are the steps on how to exit BIOS:
- Press the F10 key to save your changes.
- A confirmation window will appear.
- Press Enter to confirm.
Your computer will then exit BIOS and restart.
How to test CPU stability after overclocking
As mentioned in step 6 of the previous section, Stress testing your CPU using AIDA64 is a great way to check its stability, especially if it’s overclocked. Here’s a detailed guide,
Step 1: Download and Install AIDA64
- Open your web browser and search for “AIDA64” or “AIDA64 Extreme” in your preferred search engine.
- Look for the official AIDA64 website and locate the download link for the version that matches your operating system (usually Windows).
- Download the installation file, typically labeled as a “.exe” file, and save it to your computer.
- Locate the downloaded file (usually in your “Downloads” folder) and double-click on it to begin the installation.
- Follow the on-screen instructions to install AIDA64.
Step 2: Launch AIDA64
- After installation, you can find AIDA64 in your list of installed programs. Click the Windows Start button, type “AIDA64” in the search bar, and select the program to launch it.
Step 3: Configure the Stress Test
Once AIDA64 is launched, click on the Tools menu at the top of the AIDA64 window.
- In AIDA64, you’ll see a main menu on the left-hand side. Click on “Tools.”
- Under the “Tools” menu, select “System Stability Test.”
- In the System Stability Test window, you’ll see several options for testing your system. For CPU stress testing, make sure the “Stress CPU” box is checked.
- You can also choose to stress other components like RAM and GPU if needed, but for now, we’re focusing on the CPU.
- Under the “Test Type” section, it’s advisable to select “System Stability Test” to run a thorough CPU stress test.
- To begin the stress test, click the “Start” button.
Step 4: Monitoring the CPU temperature.
Once the CPU stress test has started, you will see the CPU temperature and other system information displayed in the AIDA64 window.
It is important to monitor the CPU temperature during the stress test. If the CPU temperature gets too high, stop the stress test immediately. You can use a temperature monitoring program, such as HWMonitor, to monitor the CPU temperature.
It’s important to ensure your CPU temperatures remain within safe limits. For most CPUs, staying below 85°C to 90°C is recommended.
Step 5: Monitoring the CPU voltage
You should also monitor the CPU voltage during the stress test. If the CPU voltage gets too high, stop the stress test immediately. You can use a voltage monitoring program, such as HWMonitor or CPU-Z, to monitor the CPU voltage.
Running the stress test for a longer period of time
If the CPU is stable during the stress test, you can run the stress test for a longer period of time. A good rule of thumb is to run the stress test for at least 12-24 hours.
Lowering the CPU clock speed or voltage if the CPU crashes or blue screens
If the CPU crashes or blue screens during the stress test, it is not stable. You need to lower the CPU clock speed or voltage until it is stable.
To lower the CPU clock speed, you can use the BIOS or UEFI settings. To lower the CPU voltage, you can also use the BIOS or UEFI settings. Follow the steps outlined in the “How to overclock CPU” section. Instead of increasing the CPU multiplier, reduce it by a few points to enhance CPU stability. You can also adjust the voltage accordingly to maintain stability.
Tips for new users
If you are new to CPU stress testing, here are a few tips:
- Start with a short stress test, such as 1-2 hours.
- Keep an eye on both the CPU temperature and voltage while the stress test is running
- If the CPU temperature or voltage gets too high, stop the stress test immediately.
- Increase the stress test duration gradually.
- If the CPU crashes or blue screens during the stress test, lower the CPU clock speed or voltage.
CPU stress testing is a valuable method to verify whether your CPU is functioning correctly after overclocking and to prevent potential CPU-related issues.
CPU Overclocking Risks:
While we’ve been careful and followed the correct steps for CPU overclocking, it’s important to grasp the potential dangers that come with it. This is not meant to frighten you, but it’s important to be extra cautious when overclocking your CPU.
- Overheating: Overclocking can lead to higher heat generation, potentially causing your CPU to overheat.
- Reduced Lifespan: Over time, overclocking may shorten the lifespan of your CPU.
- Stability Issues: Unstable overclocks can result in crashes, freezes, or data corruption.
- Voided Warranties: Overclocking often voids warranties from CPU manufacturers.
- Potential Damage: Extreme overclocking can damage or destroy your CPU.
- Power Consumption: Overclocking increases power consumption, leading to higher energy bills.
- Higher Cooling Requirements: Overclocking may demand more advanced cooling solutions, adding to costs.
So finally, when overclocking your CPU, always approach it with caution, especially if you’re new to the process.
Now that we’ve thoroughly looked at CPU overclocking, let’s move on to our next subject
GPU overclocking

Before we discuss all the steps on How to overclock GPU, we must first understand
Which GPUs Can Be Overclocked:
Desktop Graphics Cards: Most dedicated graphics cards in desktop computers can be overclocked. This includes popular models like NVIDIA GeForce and AMD Radeon cards.
Overclocking Editions: Some GPUs are specifically designed for overclocking and come with enhanced cooling solutions and higher power limits. For example, the ASUS ROG Strix and MSI Gaming X series are known for offering such options.
Which GPUs Can't Be Overclocked:
Integrated Graphics: Integrated graphics solutions, which are built into the CPU (e.g., Intel UHD Graphics), are generally not designed for overclocking. They lack the power and cooling capabilities for substantial overclocking.
Mobile GPUs: Many laptop GPUs are not easily overclockable due to limited power and thermal constraints. Some gaming laptops
with dedicated GPUs do support modest overclocking, but the potential is typically limited compared to desktop GPUs.
After understanding which GPUs can or cannot be overclocked
Now, we’ll explore GPU overclocking through the BIOS, focusing on NVIDIA GeForce RTX 3090 Ti GPU, Intel Core i7-9700K CPU, and MSI MEG Z790 Ace motherboard, as an illustrative example.
Steps to Overclock GPU
Step 1: Access the BIOS/UEFI
Proceed with the steps outlined in the previous section titled “How to Overclock the CPU.”
Step 2: Find GPU Settings
- Inside the BIOS/UEFI, use your keyboard to navigate through the menu. Look for a section related to “Advanced,” “Integrated Peripherals,” or “Chipset Settings.”
- Within this section, you might find GPU-related settings. These settings can differ from one motherboard to another.
Step 3: Adjust GPU Clock Speed
- Locate the GPU clock settings, which might be named differently depending on your motherboard. Look for terms like “Graphics Clock” or “PCIe Frequency.”
- Begin by making small adjustments. For example, you can increase the clock speed by a small increment, like +25 MHz.
Step 4: Test for Stability
- After adjusting the GPU clock settings, save your changes and exit the BIOS.
- To test the stability of your GPU overclock, run a game or a graphics-intensive application. Pay attention to any signs of instability, such as system crashes or graphical artifacts. You can also utilize AIDA64 to test the stability of your GPU. Just refer to the steps we discussed earlier in the “How to Stress Test the CPU” section, but when you get to the “System Stability Test,” select the GPU option instead of the CPU. It’s a similar process to ensure your graphics card is running smoothly and reliably.
Step 5: Monitor Temperature
Use monitoring software like HWMonitor to keep an eye on your GPU temperature while your system is under load. Make sure the temperature stays within safe boundaries.
Precautions:
Keep in mind that GPU overclocking through the BIOS can be more limited and less user-friendly compared to using dedicated GPU overclocking software like MSI Afterburner.
Not all motherboards provide GPU overclocking options in the BIOS. These settings may not be available on your specific motherboard.
Overclocking can void your GPU’s warranty.
Ensure your PC has adequate cooling to manage any additional heat generated by overclocking.
While this method is less common than using dedicated overclocking software, it’s an option on some motherboards. Always prioritize safety and system stability when overclocking.
Step 6 Save and exit BIOS
Proceed with the steps outlined in the previous section titled “How to Overclock the CPU.”
Is GPU Voltage Increase Necessary for Overclocking?
Increasing GPU voltage (also known as vCore voltage) while overclocking your GPU can help stabilize higher clock speeds. However, whether you need to do this depends on several factors:
Power Limit: Modern GPUs, like the NVIDIA GeForce RTX 3090 Ti, often have dynamic power limits. They can automatically adjust voltage and power consumption to meet the card’s needs. In many cases, this means you can achieve a moderate overclock without manually adjusting the voltage.
Silicon Lottery: Each GPU is different. Some GPUs may overclock well with stock voltage, while others might require increased voltage for stability. It’s a bit like a “silicon lottery.”
Heat Management: Increasing voltage generates more heat. To maintain stable temperatures, you may need to upgrade your GPU cooling solution, such as using an aftermarket cooler or ensuring proper case airflow.
Warranty Concerns: Overvolting your GPU may void its warranty, so it’s essential to check the manufacturer’s warranty policy.
Precautions:
- If you decide to increase GPU voltage, do it gradually and cautiously:
- Start with small voltage increments (e.g., +10mV) in overclocking software like MSI Afterburner.
- Test for stability after each adjustment by running games or GPU stress tests.
- Monitor GPU temperatures closely. If temperatures exceed safe limits, consider improving your cooling solution.
- Be aware that excessive voltage can damage your GPU, so it’s crucial to stay within recommended voltage ranges.
In many cases, a moderate GPU overclock can be achieved without adjusting the voltage. It’s advisable to prioritize stable temperatures and long-term GPU health when overclocking.
GPU Overclocking Risks:
The dangers of GPU overclocking are similar to the risks we talked about in the earlier section regarding CPU overclocking Just substitute “CPU” with “GPU” as you read through.
How to measure the effects of overclocking:
There are a few ways to measure the effects of overclocking. One common method is to use a benchmarking tool. Benchmarking tools run a series of tests on your system to measure its performance. You can then compare the results of the benchmarks before and after overclocking to see how much the overclocking has improved performance.
Another way to measure the effects of overclocking is to use a real-world application, such as a game or video editing software. Run the application before and after overclocking to see how much the overclocking has improved performance.
Here are some specific steps you can take to measure the effects of overclocking:
- Choose a benchmarking tool. There are many different benchmarking tools available, both free and paid. Some popular benchmarking tools include Cinebench 2024, 3DMark, and Geekbench 5.
- Run the benchmarking tool before overclocking. This will give you a baseline performance score to compare against.
- Run the benchmarking tool again after overclocking. This will give you a new performance score that you can compare against your baseline score.
To measure the effects of overclocking in a real-world application, you can follow these steps:
- Choose an application to test. This could be a game, video editing software, or any other application that you use regularly.
- Run the application before overclocking. Record the frame rate or other performance metric that you are interested in.
- Run the application again after overclocking. Record the frame rate or other performance metric again.
- Compare the results. If the frame rate or other performance metric is higher after overclocking, then the overclock has been successful.
Once again we would like to reiterate that it is important to monitor your system closely after overclocking to make sure that it is stable and that the temperatures are within safe limits.
How to use Cinebench 2024 to measure the benchmarking of your CPU
To use Cinebench 2024to measure the benchmarking of your CPU, follow these steps:
Downloading and installing Cinebench 2024
1 Go to the Maxon website and click on the Download button for Cinebench 2024 or use the link https://www.maxon.net/en/downloads/cinebench-2024-downloads
2 Select the version of Cinebench 2024 that is compatible with your operating system.
3 Click on the Download button again.
4 Once the download is complete, double-click on the Cinebench 2024 installer file to start
the installation process.
5 Follow the on-screen instructions to install Cinebench 2024.
Launching Cinebench 2024
Once Cinebench 2024 is installed, you can launch it by clicking on the Cinebench 2024 icon on your desktop.
Starting the benchmark
To benchmark your CPU’s multi-core performance, click on the CPU button.
Waiting for the benchmark to complete
Once you have clicked on the CPU button, Cinebench 2024 will start rendering a photorealistic image. This process will take a few minutes.
Viewing your CPU’s score
Once the rendering process is complete, Cinebench 2024 will display your CPU’s score. You can compare your CPU’s score before and after overclocking your CPU
If you are new to using Cinebench 2024, here are a few tips:
- Make sure that your CPU is properly cooled before running the benchmark.
- Close all other applications before running the benchmark.
- Run the benchmark in a quiet environment so that you can monitor your CPU’s temperature and voltage.
- If your CPU’s temperature or voltage gets too high, stop the benchmark immediately.
- You can run the benchmark multiple times to get an average score.
Cinebench 2024 is a powerful benchmarking tool, but it is important to use it carefully. By following the tips above, you can avoid damaging your CPU and get accurate results.
Conclusion on "How do I overclock my PC"
To sum up, overclocking your PC can boost performance. We’ve learned how to do it for both the CPU and GPU while being aware of the potential risks. Striking a balance between performance gains and caution is vital. You have the flexibility to overclock the CPU, GPU, or both based on your specific needs and your PC’s capabilities. So, take it slow and enjoy your faster PC!
Thank you for reading the post. We’ve covered the query “How do I overclock my PC.” Please share your thoughts and comments in the comment section below!
You might find the following topic intriguing.
CPU technology in 2024